Compared to described in the article [1] the same author proposed wall clock-thermometer is equipped with bright led lights white light with more than twice the height of the numbers. There is a possibility of insignificant zero blanking and automatic change the brightness of the display depending on ambient light. The watch can connect temperature sensor, the presence and type are detected automatically. Thanks to a noise-resistant algorithm for reading the sensor can be learned at a considerable distance from the clock.
The scheme of hours is depicted in Figure. 1. To improve the accuracy of their stroke DD2 microcontroller (PIC16F873A-I/P) is clocked by an external crystal oscillator IC DD1 frequency of 8 MHz. The watch has the following functions:
- displays the current time in 24-hour format with an error of less than 1 per day;
- display with a resolution of 1 °C remote sensor measured the temperature from -55 to +125 °C;
- every 3 with automatically substitute the value of time indicators a temperature value or Vice versa, but it is possible and a continuous display of the value selected by the user;
- automatically change the brightness of the indicators depending on the ambient light threshold value which is set by the user.
Provided for manual setting of hours, minutes and correction of readings at the precise time signals. At the removed jumper S1 operates automatically insignificant zero blanking. If there is a need to display insignificant zero, it is enough to set this jumper back.
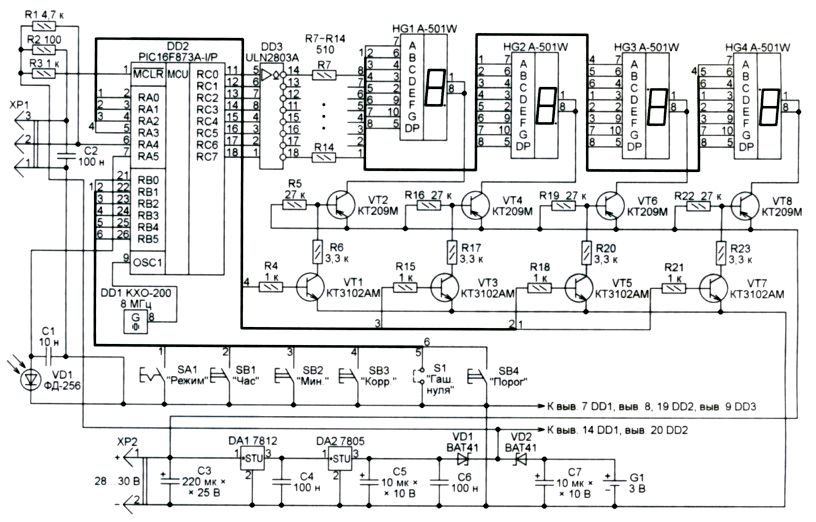
Figure. 1
Часы можно питать от любого источника постоянного напряжения 28…30 В. Они потребляют ток не более 60 мА. Автор использовал импульсный источник питания от струйного принтера “Lexmark” . В случае отключения этого источника светодиодные индикаторы гаснут, но счёт времени не прекращается, так как питание кварцевого генератора и микроконтроллера продолжается от резервного источника — литиевого элемента G1 напряжением 3 В.
Feature applied hour indicators A-501W with the height of the sign 126 mm (5 inches) — their elements are mounted seven pairs of LEDs connected in series, the total voltage drop exceeds 20 V. It is not possible to connect indicators directly to the microcontroller, the supplied voltage of 5 V.
The signals from the outputs RC0-RC7 of the microcontroller arrive at the cathodes of the led elements HG1-HG4 via electronic chip keys DD3 (ULN2803A). The signals from the outputs RA0-RA3 of the microcontroller is controlled by electronic keys on the transistors VT1-VT8, alternately connects the anodes of the indicators HG1-HG4 motherboard to the power supply circuit.
Immediately after power-on indicators are displayed zeros, starts the time count, blinking decimal point (DP elements) indicators HG2 and HG3 separating the digits of hours and minutes. Please note that the indicators HG3 and HG4 have to be installed in the watch rotated 180°. This is due to the fact that the element DP of the indicator HG3 is used as the upper dot of the colon that separates hours and minutes and the same element of the indicator HG4 is the degree symbol in the temperature display.
If the contacts of the key switch SA1 turns off, then every 3 s for indicators time values are replaced with the values of temperature measured is connected to the connector ХР1 remote sensor and back. Locking key switch SA1 in the closed position adjusts the clock mode to constantly display the current value indicated on the indicator at the moment of contact closure size — time (Fig. 2) or temperature (Fig. 3). With the breaking of the switch contacts periodic change of time and temperature on the display is resumed.
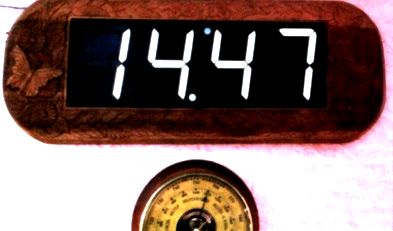
Fig. 2
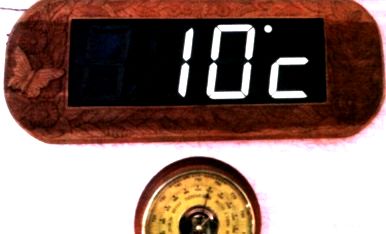
Fig. 3
The temperature sensor can be any of the DS18B20, DS1822, DS18S20, DS1820, and the program determines it automatically. The pin numbers of the connector ХР1 match the connected insights of the listed sensors. It can be installed not only in the room but outside the window or on the balcony. When installing the sensor on the street is advised to use the guidelines given in my article [2]. If it is not connected (or connecting wire is cut), the indicators display only the current time.
The button SB1, if necessary, set the appropriate time the exact number of hours, and SB2 — minutes. Pressing the button SB3 suspends track of time and displays on the indicator is zero minutes. If before pressing the number of minutes the indicator was over 30, the number of hours increases by one. Otherwise it will remain unchanged. From the moment you release the button by the time it resumes. When the light in the room corresponds, in the opinion of the user, the threshold, simply click on SB4 and hold until the indicators on the dash. In the EEPROM of the microcontroller will be written with a value proportional to the current ambient light operating in the photovoltaic mode of the photodiode VD1 (PD-256), which is then used as a threshold. When the luminance is below the threshold, the brightness indicator is automatically reduced, and when the above — will increase. Button SB4 should be placed in such a location so as not to shade the photodiode in the process of threshold setting. In the original it is placed on the cost indicators, where it is fixed by hot melt adhesive.
Конструктивно часы состоят из модуля индикаторов размерами 420×140 мм и модуля контроллера, смонтированного на печатной плате размерами 130×100 мм. Чертёж двух печатных плат (по два индикатора на каждой), из которых состоит модуль индикаторов, не приводится ввиду их простоты и больших размеров. Для жёсткости между индикаторами и платами, на которых они установлены, проложена толстая пластина из изоляционного материала. Чтобы увеличить контрастность изображения, надо индикаторы закрыть автомобильной тонировочной плёнкой.
The best solution (if there is a bath for etching the desired size) can be to manufacture a single circuit Board indicators of fiberglass with a minimum thickness of 2 mm. is Not excluded and the option of wiring the indicators on the plywood or plastic sheet of appropriate size and thickness.
Controller Board, a drawing of which is shown in Figure. 4 designed for installation push-button switch В4003 and buttons with corner insights TS-A6PV-130. Under the button other type of fee may have to be refined. For lithium battery CR2032 (G1) installed on the circuit Board holder BH-642. Integrated crystal oscillator CWC-200 to 8 MHz can be replaced (with a small deterioration in precision) of the generator elements with a TTL separate quartz resonator [3].

Fig. 4
Правильно собранное устройство налаживания не требует. Необходимо лишь до монтажа микроконтроллера на плату записать в его память выбранную программу. Предлагаются два варианта программы: стандартный (файл c_t_873.hex) и с “солнечной” коррекцией температуры (файл c_t_873_sol.hex). Вариант с коррекцией автор разработал и использует в связи с тем, что у него датчик температуры расположен на солнечной стороне дома. Несмотря на меры, принятые для защиты датчика от прямых солнечных лучей, при ясной солнечной погоде погрешность показаний датчика значительно возрастает. Она была определена экспериментально и скомпенсирована в программе автоматическим вводом в показания датчика поправки в соответствии с table before displaying it on the display.
| Measured temperature, °C | Amendment, °C |
| Below -25 | -3 |
| -25…-21 | -1 |
| -20…+20 | 0 |
| +21…+25 | -1 |
| +26…+30 | -3 |
| Above +30 | -4 |
LITERATURE
- Harsh V. Wall clock thermometer. Radio, 2008, no. 12, pp. 39-41.
- Harsh V. Clock-thermometer Radio, 2003, No. 10, pp. 39-41.
- Nechaev I. Design at the logical elements of digital circuits, MRB. vol. 1172. — M.: Radio and communication, 1992
Download the file to the project (PCB file format Sprint Layout 6.0 and two versions of the program of the microcontroller)
Author: V. SUROV, Gorno-Altaisk
Source: Radio №2, 2016